Every powerboater knows the thrill of open water, but the unexpected can happen in moments. From fires to man-overboard scenarios, emergencies test your preparation and quick thinking. Practicing powerboat safety drills isn’t just a good habit—it’s the difference between chaos and control. This guide will outline the drills every powerboater should master to protect lives and ensure confidence in any crisis.
Man Overboard Recovery Drill
A man overboard (MOB) scenario is one of the most alarming situations a boater can face. Quick thinking and precise action are essential to ensure the safe retrieval of the person in the water. Practicing a man-overboard recovery drill ensures you and your crew are equipped to respond effectively, minimizing risk and maximizing safety.

Steps for a Man Overboard Recovery Drill
Being prepared is key. These are the steps you need to follow to retrieve someone who has fallen overboard safely:
- Shout “Man Overboard” Loudly: As soon as someone falls into the water, alert everyone on board. The quicker the crew reacts, the better the chance of recovery. Assign one person to keep their eyes on the individual in the water at all times.
- Throw a Floatation Device: Immediately toss a life ring, buoy, or throw line to the person in the water. These devices help the individual stay afloat and mark their location for the captain and crew. A US Sailing guide on rescue procedures highlights the importance of staying as close as possible to the MOB.
- Mark the MOB’s Location: If the boat drifts, use the onboard GPS or a physical marker to note your position. Many vessels also have a “MOB” button on their navigation systems to log the location of the incident.
- Slow the Boat and Turn: If possible, reduce speed immediately. Perform a controlled turn to bring the boat back towards the MOB. Maintain a safe but close distance, avoiding propeller risks.
- Approach into the Wind: Ideally, in any man overboard scenario, the casualty should be approached with the vessel downwind of the persons position, with the vessel moving upwind. as detailed in this MOB Drill guide.
- Use a Ladder or Lift for Retrieval: Extend a boarding ladder, net, or rescue sling into the water. If necessary, use a boat hook to assist the individual in reaching the ladder. Be cautious of the boat’s movement in waves or rough conditions.
Tips for a Successful MOB Drill
- Practice With a Dummy: If you’re just starting, use a floating object like a buoy to simulate a person. This makes training safer and more consistent.
- Assign Roles: Designate responsibilities in advance. Who will steer? Who will throw the floatation device? Who will assist in pulling the person aboard?
- Review After Every Drill: Evaluate what went well and what can be improved. Was everyone calm? Did you retrieve the MOB quickly?
For more detailed emergency procedures, the American Sailing Association provides practical tips and resources for handling MOB incidents. Regularly practicing drills builds muscle memory and confidence, making your response to real-life emergencies swift and efficient.
Fire Safety Drill
Fire is one of the most dangerous emergencies on a powerboat. Effective prevention, preparation, and action can save your vessel and lives. Mastering fire extinguishers and implementing prevention habits will significantly enhance your boat’s safety. Here’s what you need to know.
Using Fire Extinguishers Effectively
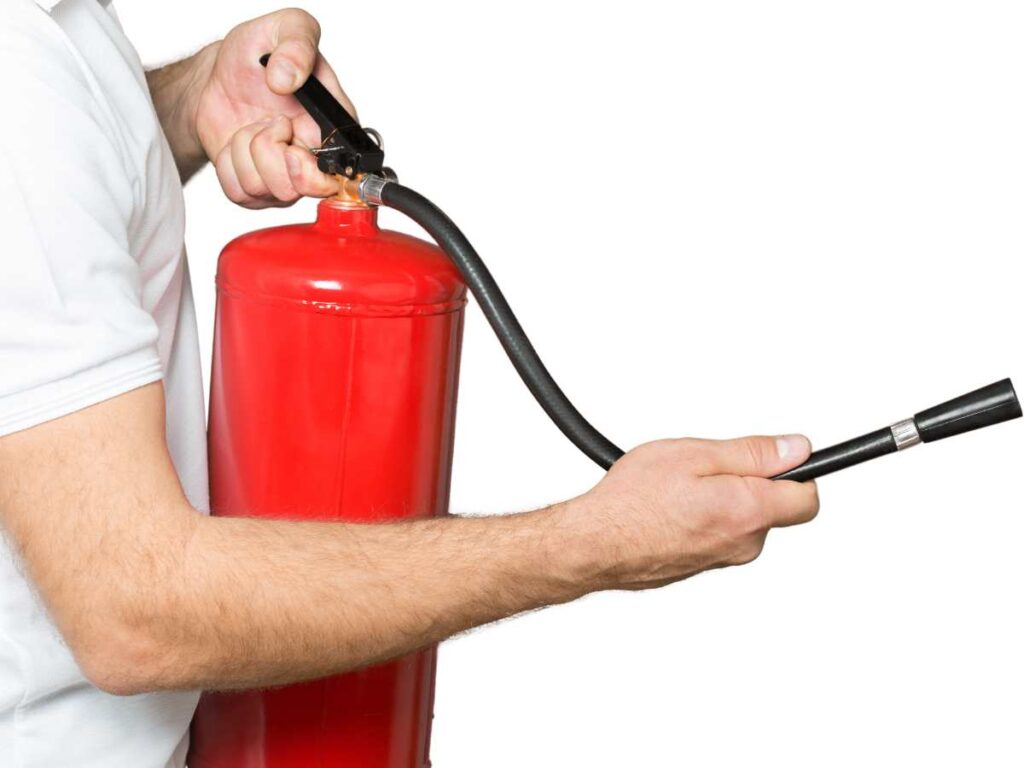
Knowing how to use a fire extinguisher without hesitation is crucial when a fire breaks out. The PASS technique is an easy way to remember the basic steps for operating a fire extinguisher:
- Pull the pin to break the seal.
- Aim the nozzle at the fire’s base, not the flames.
- Squeeze the handle to release the extinguishing agent.
- Sweep from side to side, keeping your aim at the fire’s base.
Position your fire extinguishers where they can be grabbed in seconds. Common locations include near the galley, engine room, and helm station. Ensure the extinguishers onboard are marine-rated and serviced regularly. Explore this PASS Method for Fire Extinguishers for a detailed guide on this technique.
Frequent crew drills can make these steps second nature—practice with every crew member, including scenarios where smoke or panic might affect decision-making.
Fire Prevention Measures
Preventing a fire on your powerboat begins long before ignition. A proactive approach to maintenance and onboard safety habits can drastically reduce risks. Here’s how:
- Inspect Fuel Lines Regularly: Look for cracks, dry rot, or leaks. Replace any worn lines immediately.
- Check Electrical Systems: Corroded wires or loose connections can spark a fire. Keep systems clean and dry.
- Properly Store Flammable Materials: Secure fuel and cleaning supplies in sealed, ventilated compartments.
- Ventilate the Engine Room: Before starting the engine, open hatches and allow fresh air to circulate. This helps clear any trapped fumes.
- Install Smoke and Carbon Monoxide Detectors: These devices provide early warnings when seconds count.
For more detailed tips, check out this Fire Prevention on Boats Guide, which outlines key practices to keep your vessel safe. Additionally, always have an emergency plan and share it with anyone onboard.
A well-maintained boat combined with thoughtful fire safety measures is your best defense against onboard fires. Prevention doesn’t take much effort but pays off exponentially when a crisis arises.

Sinking or Capsizing Drill
Knowing how to respond effectively if your boat starts sinking or capsizing can save lives. This drill ensures you’re prepared to evacuate safely, signal for help, and assist others organizationally. Preparation is critical, whether due to rough waters, mechanical issues, or unforeseen accidents.
Emergency Evacuation Steps
When the boat starts to sink or capsize, quick and coordinated action is essential to prevent injuries or fatalities. Make sure you know these steps:
- Prioritize Life Jackets: If you aren’t already wearing a life jacket, immediately put one on. Encourage all passengers to do the same. Modern life jackets are designed to keep you afloat even in rough waters and significantly increase your survival odds.
- Issue a Clear Command: The boat’s captain or an assigned leader should give loud, clear commands for everyone to exit the boat. Consistency and authority help minimize panic.
- Head for the Nearest Exit: Locate the closest safe exit route. Avoid clustering at one spot. In situations involving capsizing, always try to move to the highest point or stay on the boat as long as it’s safe.
- Assist Young or Elderly Passengers: Help those who cannot don life jackets quickly or move to safety on their own. Assign stronger swimmers to ensure they stay with less able passengers.
- Avoid Overloading Rescue Vessels: If lifeboats or rafts are part of your boat’s equipment, use them wisely. Overloading can lead to additional risks during an emergency.
Familiarizing yourself with these actions reduces confusion. To learn more about evacuation procedures, check out this guide on preparing for a sinking ship.
Distress Signal Deployment
Once everyone is accounted for and safe, drawing attention to your location becomes the priority. Use the correct visual and auditory distress signals to increase the chances of a swift rescue. Here’s how:
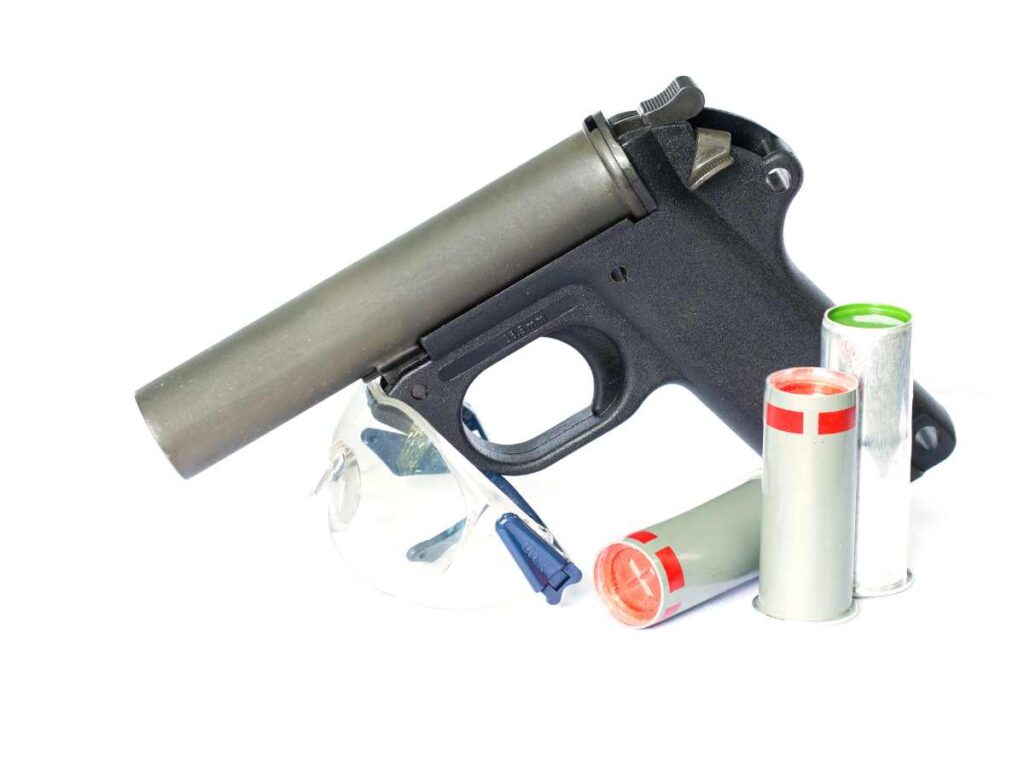
- Use Visual Signals
- Deploy flares from your emergency kit. Red handheld flares or parachute rockets work at night, while orange smoke signals are best during the day.
- Lift a distress flag—an orange flag featuring a black square and circle. Attach it to a visible part of your boat or nearby debris. Learn more about signal options in this visual distress signal guide.
- Activate Auditory Signals
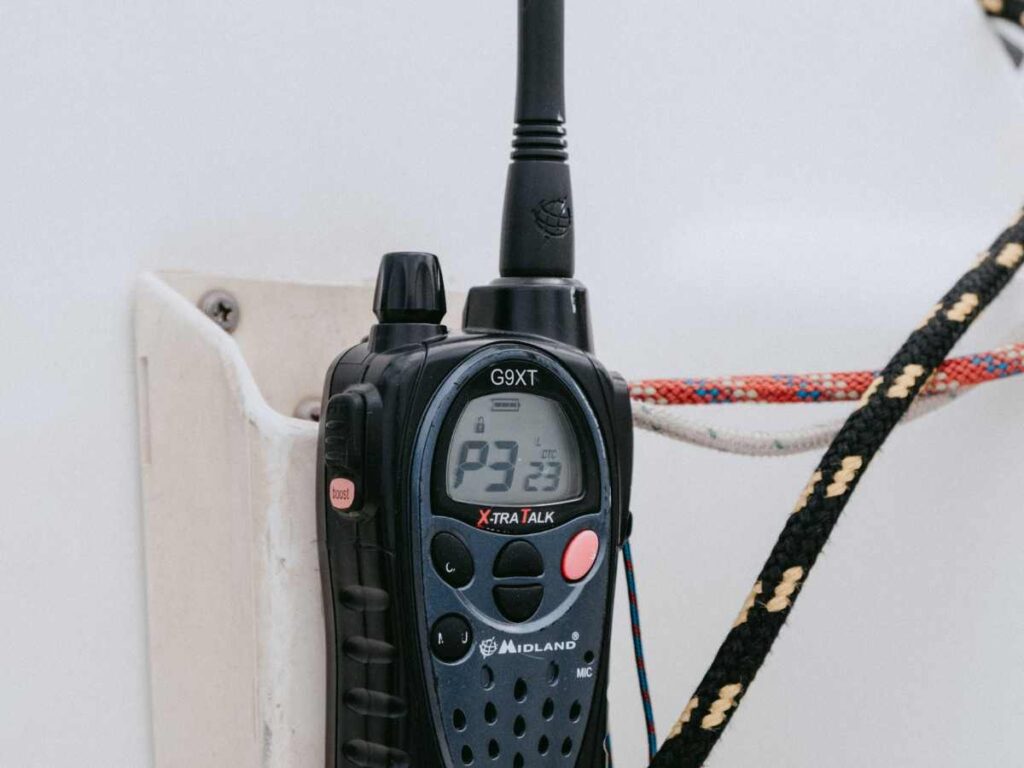
- Use your boat’s horn or a whistle to make repetitive short bursts, signaling distress. If you have a working VHF radio, broadcast a universally recognized Mayday call.
- Enable Emergency Beacons
- If available, activate an EPIRB (Emergency Position-Indicating Radio Beacon) or PLB (Personal Locator Beacon). These devices send your location to search and rescue authorities when activated.
- Create Night Visibility
- Turn on strobe lights if you have them. Flashing lights are visible at greater distances and signal an urgent need for help.
Ensure you have the right equipment and know how to use it effectively to significantly improve your emergency preparedness. For additional techniques, review this resource on distress signal options.
Regularly planning and running these drills sets your crew up for success in life-threatening scenarios. Knowing how to act during high-stress moments is often the deciding factor between survival and tragedy.
Collision Drill
Collisions represent one of the most serious situations a powerboater can face on the water. Beyond the initial shock, reacting appropriately can prevent further harm to passengers, equipment, and the environment. Practicing a collision drill ensures you’re ready to assess damage, stabilize the situation, and communicate effectively during emergencies.
Assessing Damage
After any collision, the first step is to determine the severity of the incident. Inspect the boat thoroughly for hull breaches and other critical issues to ensure your vessel can safely remain afloat. Here’s how:
- Check the Impact Zone: Start with the area of the boat that made contact. Look for visible cracks, punctures, or signs of water ingress. Even minor breaches can develop into significant issues.
- Inspect Below Deck: Head below deck to examine the hull. Pay close attention to joints, seams, and corners where structural damage might not be obvious.
- Look for any signs of water pooling or dripping.
- Feel for unusual vibrations or movement underfoot; this could indicate structural damage.
- Test Key Functions: Ensure the bilge pump is operational, as it may need to manage incoming water. Check the steering and propulsion systems to ensure you retain maneuverability.
- Take Immediate Action: If you notice water leaking into the boat, activate the bilge pumps immediately. To slow the flow of water, stuff breaches with emergency plugs, rags, or any available materials.
- Explore resources like US Powerboating Collision Avoidance Guide for a deeper understanding of preventing collisions.
Remaining calm and methodical during this process minimizes further damage and allows you to make well-informed next steps.
Emergency Contact Protocols
KnowingKnowing how to call for help is critical when a collision significantly compromises safety when a collision significantly compromises safety. Delayed communication can worsen the situation, especially if you’re far from land or in poor visibility.
- Establish Channel 16 Communication: Activate your marine VHF radio and tune to Channel 16. This is the designated emergency frequency the Coast Guard and other vessels monitor. Clearly state:
- The distress call (“MAYDAY” three times for life-threatening emergencies).
- Your location using GPS coordinates or landmark references.
- A brief description of the issue (e.g., “Collision, possible hull breach, taking on water”).
- Number of people aboard and any immediate medical needs.
- Use Backup Devices: If your radio isn’t functional, deploy alternatives like an EPIRB (Emergency Position Indicating Radio Beacon) or a satellite phone to alert rescue services. Knowing how to use these tools in advance is fundamental to crew training.
- Alert Nearby Vessels: If other boats are close, use visual signals like waving an orange distress flag or deploying flares. Audible tools, such as an air horn, can also draw attention. For more advice, check out emergency preparedness tips.
- Secure the Scene: While waiting for help, continue assessing hazards that could escalate the situation, such as fire risks or worsening leaks. Keep passengers calm and informed about ongoing actions.
Understanding and rehearsing these steps ensures your crew knows precisely how to respond when seconds matter most. For more guidance on emergency calls, review this marine communication guide.
Incorporating collision drills into your safety training routine’ll foster confidence and preparedness to handle even the most unexpected events.
Mechanical Breakdown Drill
Mechanical failures can strike unexpectedly, turning a relaxing excursion into a stressful ordeal. Knowing how to respond calmly, efficiently, and safely during a mechanical breakdown is essential for every powerboater. From deploying an anchor to prevent drifting to utilizing backup power or tools, preparation is your best ally in maintaining control.

Anchor Deployment
When faced with an engine failure or any mechanical breakdown, one of your first priorities should be to prevent the boat from drifting into unsafe areas like other vessels, shallow waters, or rocky shores. Proper anchor deployment ensures you stay secure until assistance arrives or the issue is resolved.
- Choose the Right Spot to Drop Anchor: Survey your surroundings for a safe anchoring spot. Opt for areas with good holding ground, such as sand or mud. Avoid locations with heavy currents or dense vegetation that could interfere with the anchor’s hold. For anchoring tips, you can explore this guide to deploying an anchor.
- Prepare the Anchor and Rode: Ensure the anchor is ready, and the rope (chain and rope combination) is untangled. This avoids delays during deployment, which can be critical if strong winds or currents push your boat off course.
- Lower the Anchor Slowly: Lower the anchor gradually while reversing the boat at low speed to maintain control. Release enough scope (the ratio of the length of the rode used to the depth of the water) to ensure a secure hold—typically between 5:1 and 7:1.
- Monitor the Anchor’s Hold: Once the anchor is on the seabed, let the boat settle and observe its stability. Use reference points onshore or onboard instruments to ensure you’re not drifting. For additional anchoring insights, refer to this boatUS anchoring overview.
By mastering these steps, you’ll not only halt unwanted drift but also gain the time you need to troubleshoot the mechanical issue safely.
Using Backup Power or Tools
During a mechanical breakdown, having backup power sources and the right tools onboard allows you to address the problem directly or at least maintain essential functions until help arrives.
- Auxiliary Power Sources: Many powerboaters carry portable power banks or backup batteries to run essential electronics like navigation systems or radios during an emergency. Consider a robust option, such as the Anker 400, as this portable power guide recommends. If equipped with the appropriate functionality, these can also help jumpstart engines with dead batteries.
- Manual Tools for Troubleshooting: A reliable toolkit is indispensable. Always onboard items like adjustable wrenches, screwdrivers, duct tape, and marine-grade rope. These tools often provide a quick fix forThese tools provide a quick fix for minor mechanical issues, such as loose bolts, frayed belts, or stuck parts.
- Battery Backup Systems: If you rely heavily on electronics, consider installing a dual-battery system to separate starting and house power needs. Alternatively, a quality DC power station can provide additional backup options and sustain critical functions. Learn more about 12-volt power systems in this guide from Boating Magazine.
- Emergency Start Tools: In unique situations, boaters have used simple tools such as cordless drills with the right attachment to manually turn over small outboard engines, as discussed on forums like this one. While unconventional, these techniques demonstrate the value of creativity and resourcefulness on the water.
By ensuring readily available backup power and essential toolsare , you can stay proactive in resolving mechanical challenges, minimize downtime, and prioritize safety for everyone onboard.

Low-Visibility Navigation Drill
Operating a powerboat in low-visibility conditions demands precision and attentiveness. These situations can challenge even the most seasoned boaters, whether due to dense fog, heavy rain, or nighttime darkness. Practicing a low-visibility navigation drill helps ensure safety by reinforcing critical skills like managing navigation lights and adjusting speed for better control. Below, we break this down into two essential components.
Proper Use of Lights and Signals
Navigation lights and sound signals serve as your lifeline in low-visibility conditions. They help other vessels locate you and ensure compliance with maritime regulations. Here’s why they matter and how to use them effectively:
- Turn On Navigation Lights Early: As visibility drops, activate your boat’s navigation lights. Depending on your vessel’s size and type, these include red and green sidelights, a white stern light, and a masthead light. Following the proper setup is not just a safety measure but is legally required. Learn more about navigation light requirements to ensure your boat is compliant.
- Use Audible Signals: Horns and whistles are essential tools during fog or heavy rain. For instance, one prolonged blast every two minutes indicates a powerboat underway. These signals alert nearby boats to your presence and minimize the chances of collision. Check out this guide on navigation lights for additional safety tips.
- Check All Equipment Regularly: Routine maintenance of lighting systems and signaling devices is essential. Dead batteries or faulty wiring can leave you vulnerable during emergencies.
Think of lights and sounds as your boat’s voice and eyes, communicating your position and intentions when they matter most.
Slow-Speed Maneuvering
Reduced visibility significantly amplifies the risks of navigating at higher speeds. By practicing slow-speed maneuvering, you can navigate obstacles with better control while ensuring passenger safety. Here’s what to focus on:
- Reduce Your Speed Immediately: Slowing down gives you more time to react to sudden obstacles, like floating debris or other vessels. To improve control, practice transitioning between idle and slow-forward speeds in a controlled environment. For more tips, take a look at techniques in slow-speed maneuvers.
- Stay Aware of Your Surroundings: Use radar, GPS, or other navigation aids to monitor your position. If your boat is equipped with radar reflectors, ensure they are functioning to make your boat more visible to others. Even minimal speed requires heightened vigilance.
- Practice Docking and Stopping Skills: Focused, repetitive practice in low-speed settings, like a marina or open area, helps build confidence. Master techniques like coasting in neutral for finer control, as explained in this slow-speed guide.
For boating, low-visibility maneuvering mirrors walking through a dark room: proceed slowly, rely on your other senses, and trust your tools. You can turn a potentially stressful situation into a manageable one with careful practice.
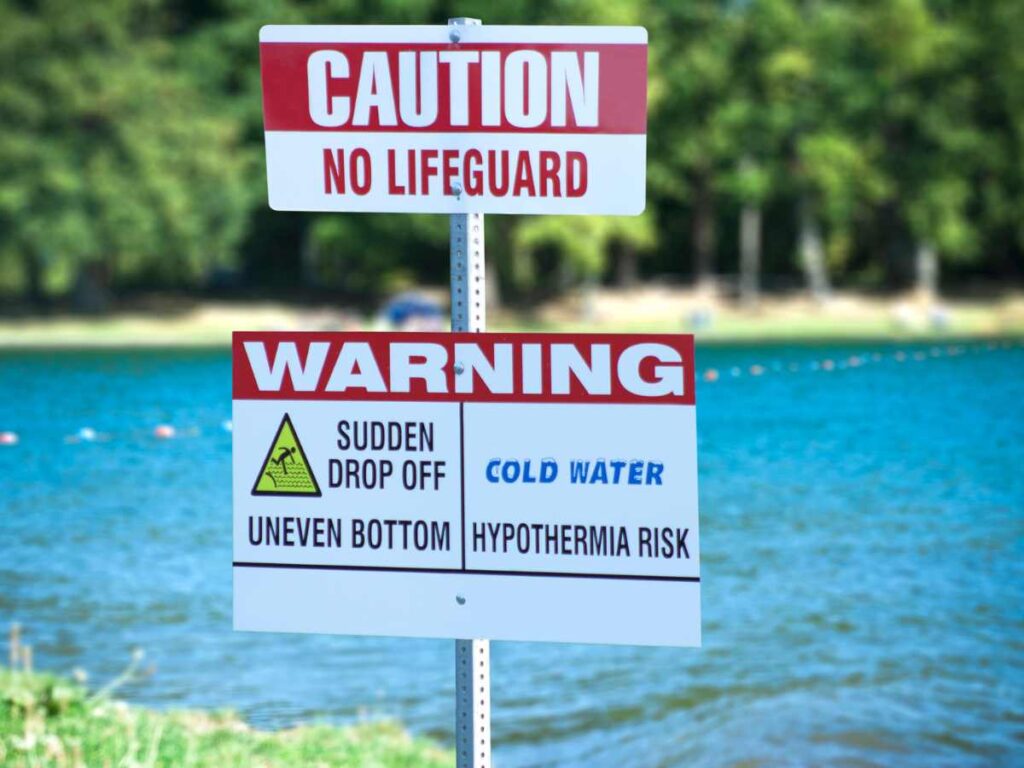
Hypothermia Prevention Drill
Cold weather or unexpected water exposure can quickly lead to hypothermia, a dangerous condition where the body loses heat faster than it can produce. Understanding how to prevent and recognize hypothermia is essential for the safety of everyone onboard. Here’s what you need to know.
Warming and Drying Techniques
When facing cold conditions, keeping passengers warm and dry is your first line of defense. If someone has been exposed to cold water or is wet from rain, immediate action can prevent a drop in body temperature. Here are some practical steps:
- Change Into Dry Clothing: Wet clothes trap cold against the skin, amplifying heat loss. Swap them out for dry garments as soon as possible. Keep a waterproof bag with extra clothing onboard for emergencies.
- Use Blankets or Sleeping Bags: Wrap passengers in insulated blankets, thermal wraps, or even sleeping bags. Focus on keeping the chest, neck, and groin areas warm, as these are the most critical zones for retaining heat. Portable thermal blankets like those used by first responders are a great addition to any emergency kit.
- Provide Warm Beverages: A warm, non-alcoholic drink like tea or hot water with sugar can help raise core body temperature. Avoid caffeine or alcohol, which can affect circulation and exacerbate heat loss.
- Utilize Passive or Active Warming: Passive warming involves insulating the individual from the environment, while active warming uses external heat sources such as chemical heat packs or electric blankets. For safe and effective warming, place heat packs near the chest and armpits. Check this hypothermia prevention guide for more details.
- Skin-to-Skin Contact: If no other warming options are available, skin-to-skin contact, combined with wrapping both individuals in a blanket, can help transfer body heat. This is especially effective in extreme situations.
Being prepared with the right tools and techniques can make all the difference. This Mass General Brigham article offers more prevention strategies.
Recognizing Hypothermia Symptoms
Early identification of hypothermia can prevent the condition from worsening. Symptoms may vary depending on severity, but knowing the warning signs and how to respond is critical.
- Mild Hypothermia Symptoms
- Shivering and cold skin
- Slurred speech or mumbling
- Fatigue or lethargy
- These early signs often go unnoticed but indicate that the body struggles to generate heat. Move the person to a warmer environment immediately and apply the abovementioned warming techniques.
- Moderate Hypothermia Symptoms
- Confusion or impaired thinking
- Slowed movements and clumsiness
- Shivering may stop as the body slows down.
- At this stage, quick intervention is essential to prevent further decline. Be gentle with the individual and avoid rough movements, which could cause cardiac issues. For additional insight, refer to this WebMD overview on hypothermia symptoms.
- Severe Hypothermia Symptoms
- Weak pulse or slowed heart rate
- Blue or pale skin tone
- Loss of consciousness or unresponsiveness
- Severe cases are life-threatening and require immediate medical attention. Until help arrives, continue warming efforts and monitor breathing and pulse. For emergency first aid, consult this Mayo Clinic treatment guide.
Recognizing these symptoms early and acting swiftly can save lives in critical situations. Always prioritize safety by practicing hypothermia prevention drills regularly with your crew.

Disabled Passenger Safety Drill
Safety drills for disabled passengers are crucial to ensuring a truly inclusive boating experience. Whether aiding wheelchair users or individuals with other mobility challenges, preparation can mean the difference between safety and chaos during an emergency. From securing mobility aids properly to developing clear procedures for evacuation, here’s how to get it right.
Properly Securing Mobility Devices
Wheelchairs and other mobility aids must be safely managed on boats to prevent shifting during sudden maneuvers, waves, or emergencies. An unsecured device can become hazardous for the user and other onboard passengers. Here are key steps to secure mobility aids effectively:
- Use the Right Tie-Down Equipment: Invest in marine-grade tie-down systems. These are specifically designed to withstand a boat’s constant motion and vibrations. For more equipment tips, refer to this guide on securing mobility devices on equipment.
- Secure in a Stable Location: Choose a spot close to the boat’s center to minimize movement caused by swaying or pitching. Wall-mounted brackets or anchor systems with straps work well for most mobility aids. Make sure these areas are pre-marked for easy identification.
- Avoid Blocking Exit Points: When securing mobility devices, ensure they don’t obstruct pathways to exits or emergency equipment. Accessibility is vital in urgent situations.
- Provide Non-Slip Mats: Place non-slip rubber mats beneath the mobility device to reduce sliding. This adds an extra layer of security, especially in wet conditions.
For additional best practices in accommodating passengers with disabilities, see insights on marine accessibility guidelines.
Emergency Evacuation Assistance
Emergencies often demand quick exit strategies, but disabled passengers may need extra assistance. Planning and practicing these scenarios ensures that no one is left behind. Here’s what to include in your procedures:
- Assign Specific Roles: Designate crew members to assist disabled passengers during an evacuation. This ensures accountability and speeds up the process when seconds count.
- Offer Clear, Direct Instructions: Communication is key. Use simple, actionable language to describe the emergency and the steps required. The Stanford Guide for Assisting People with Disabilities is a helpful resource on this.
- Provide Physical Support: Depending on the individual’s needs, this may involve lifting, using a transfer board, or guiding them securely. Avoid sudden movements that could cause injuries.
- Prep Evacuation Equipment in Advance: Items like evacuation chairs, ramps, or hoists should be tested regularly and kept in inaccessible locations.
- Practice Regular Drills: When conducting safety drills, simulate scenarios involving disabled passengers. This helps identify potential bottlenecks or issues in your plan.
- Adapt for Cognitive Disabilities: Be prepared to assist passengers who may have difficulty processing or following directions due to cognitive challenges. Check out these evacuation tips for people with disabilities.
Planning for disabled passenger safety is about more than compliance—it’s about compassion. Integrating these practices ensures everyone onboard feels secure and valued on the water.

Sudden Illness or Injury Drill
Dealing with a sudden illness or injury on the water requires swift action and preparedness. Powerboaters must be equipped to provide immediate aid and contact emergency services if needed. The following steps offer guidance on handling such situations.
Administering First Aid
A well-stocked first aid kit is your first defense in managing medical emergencies. Here’s what should be in your kit and how to use it for common injuries:
Essential Items for Your First Aid Kit
Make sure your kit contains these key supplies:
- Adhesive bandages (various sizes)
- Sterile gauze pads and medical tape
- Antiseptic wipes or solution for cleaning wounds
- Tweezers and scissors for removing foreign objects and cutting dressings
- Elastic bandages for sprains and muscle injuries
- Gloves for hygienic handling
- Cold compresses for swelling or bruises
Check out the Mayo Clinic’s guide for a comprehensive first-aid kit checklist.
Steps for Common Injuries
- Cuts or Abrasions: Rinse the area with clean water, apply an antiseptic, and cover the wound with a sterile dressing.
- Sprains and Strains: Use a cold compress to reduce swelling. Wrap the affected area with an elastic bandage for support, but avoid tightening it excessively.
- Heat Exhaustion: Move the individual to a shaded area, give them water, and use a damp cloth to cool their skin.
- Severe Bleeding: Apply direct pressure to the wound using a sterile pad or clean cloth. If the bleeding doesn’t stop, elevate the injured area above the heart level.
Knowing basic first aid helps stabilize conditions and buys critical time until professional help arrives. For more tips, explore this Red Cross article on first aid essentials.
Radioing for Medical Assistance
If the situation exceeds what first aid can handle, contacting emergency services via marine radio is essential. Proper knowledge of marine communication can save lives when every second counts.
Steps for Using a Marine Radio
- Set the Radio to Channel 16: Channel 16 is the universal emergency frequency the Coast Guard and nearby vessels monitor. Ensure your radio’s squelch control is set to minimize static noise.
- Know What to Say: Clearly articulate the following information to convey the seriousness of the situation:
- Call “Mayday” three times if the situation is life-threatening. This indicates a grave emergency needing urgent assistance.
- Provide your boat’s location using GPS coordinates or nearby identifiable landmarks.
- State the nature of the emergency (e.g., “We have a passenger with severe chest pain, possibly a heart attack”).
- Mention the number of people onboard for potential rescue efforts.
- Await Confirmation: After sending your distress call, listen for acknowledgment from authorities or nearby boats. Repeat your call every few minutes until you get a response.
Using a marine radio might seem daunting, but practicing ahead of time can make the process second nature. Learn more about radio protocols in this BoatUS communication guide.
A sudden illness or injury drill in your safety routine ensures everyone knows what to do if disaster strikes, reinforcing confidence and preparedness onboard.
Start Powerboating Right at In-Command Seamanship Training
This 10 powerboat safety drills guide covers highlight one essential truth: Preparation is everything. Emergencies on the water demand calm, quick, and confident action—and the best way to respond under pressure is to practice regularly and train with intention.
Powerboat safety drills protect lives and build muscle memory, encourage teamwork, and foster a culture of awareness and responsibility. With a well-prepared mindset and a trained crew, you dramatically increase your ability to respond effectively in critical moments.
Take your boating safety seriously: review your procedures, check your equipment, and stay sharp by practicing consistently. Every drill you run builds the confidence that keeps you and your passengers safe.
✅ Ready to Train? Start with the Gold Standard.
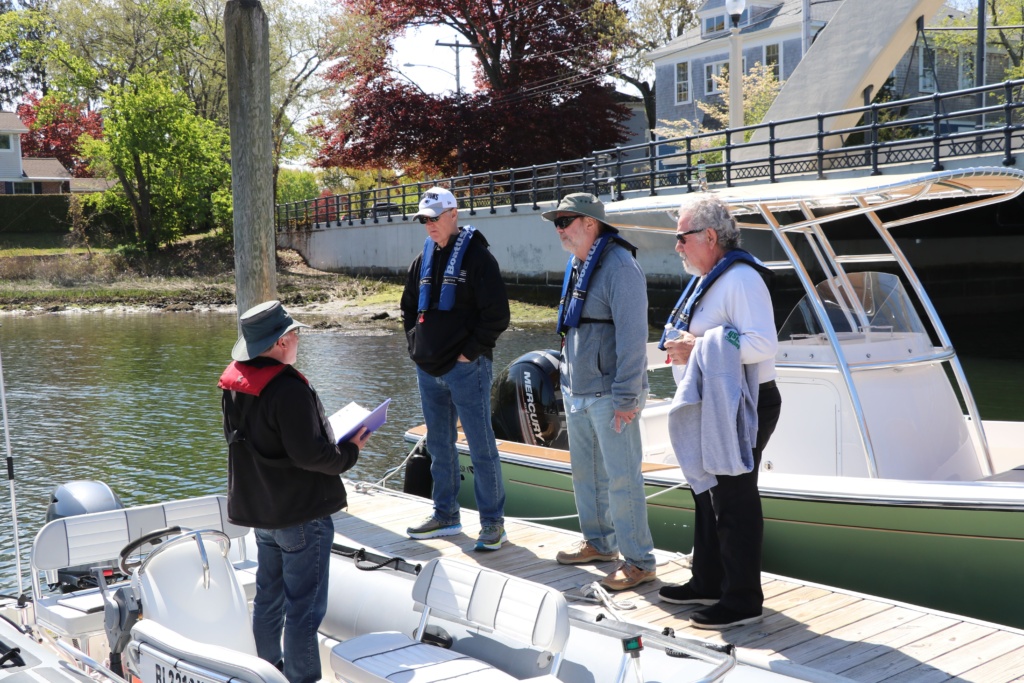
Enroll in US powerboating – Start powerboating right now! (Safe Powerboat Handling) course at In-Command Seamanship Training. This nationally recognized, 16-hour program combines classroom knowledge with hands-on, on-the-water experience. It’s ideal for beginners and boaters of all experience levels who want to:
- Safely operate a small powerboat
- Learn close-quarters handling
- Improve docking and departure skills
- Perform essential rescues like person-in-water recovery
- Navigate confidently using the “Rules of the Road”
No experience is required, and you’ll earn the US Powerboating Safe Powerboat Handling Certificate (NASBLA approved) and your State Boating Education Card.
Prefer to train on your boat? We can schedule the on-the-water portion at your location.